


Building in Peace: An Introduction To WordPress Local Development
You’ve purchased your domain and you’ve secured your hosting. You’re halfway through your new kick-ass homepage, but you can’t shake the feeling that you’re being watched. That’s because your site is live, so who knows who might be looking over your shoulder…
At WPMU DEV, many of our members use local environments for a variety of tasks, including building a new site from scratch, major overhauls of existing sites, and developing plugins.
But for those who are yet to venture into local development or are looking for a refresher, we bring you this guide.
Here’s a look at what we’ll be covering:
- What is a Local Environment?
- How do local environments work?
- An insight into the two main types of local environment – server stacks and virtual machines.
- How to set up a local environment using Local by Flywheel.
- How to migrate a locally developed site to live hosting.
So let’s get to it and start at the beginning…
What is a Local Environment?
Local environments come in a variety of shapes and sizes, however, they all share the same purpose – to allow you to develop WordPress sites or plugins in a safe and secure space.
The average WordPress user starts their site-building process by purchasing a domain and then choosing a hosting service – which they then log into and begin to create their site.
However, this means that whilst you’re building your site, it’s live on the net and Google is free to start its indexing procedures.
The last thing you want is someone stumbling across your site when you’re in the process of building it. Also, when still in construction, your site is especially vulnerable to cyber attacks.
Developing in a local environment relieves you of these worries, as you get the same features and functionalities of WordPress – but it’s all tightly secured within your very own computer.
There are no servers or clouds involved, no chance of anyone who isn’t on your pc gaining access, and no extra cost.
You can develop your site for free and away from prying eyes – total bliss!
There are a few other ways to achieve privacy when building a site, such as under-construction themes and plugins and staging environments – but since they still involve your site being hosted somewhere on the net, there’s no peace of mind quite like a local environment.
How Does a Local Environment Work?
WordPress is made up of three core elements: PHP, SQL and JavaScript, and in-turn can be hosted locally on software that supports these elements.
The first method is on a server stack.
Using Server Stacks For Local Development
Local server stacks take the form of an Nginx or Apache server, along with a database (usually in the form of MySQL or MariaDB) and a platform for managing everything, such as phpMyAdmin.
But, what is a server, I hear you ask!
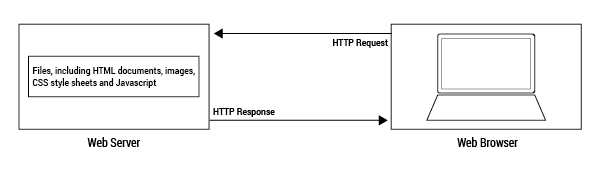
Well, it’s essentially a place to store all the content that makes up a website (application data, text, images, etc), and once someone requests access by visiting the URL, the server delivers the goods.
All sites need to be stored on a server, whether that be a local one such as included with the software stacks mentioned above, or secured through a hosting provider.
If your website is live and you pay a hosting subscription, it’s still hosted on a server, just on someone else’s computer.
It may sound complicated at this stage, but luckily you can download everything you need in a neat little package.
Two of the most popular server stacks are MAMP and XAMPP.
MAMP is technically for use on Mac (however you can run it on Windows – I’ve done this myself in the past) and XAMPP can be used across Windows, Mac, and Linux.
Whilst actually using WordPress when it’s hosted on an apache server stack is quite a simple and pleasant experience, the installation and setup process for XAMPP/MAMP isn’t as straight forward.
You need to install the download from either the XAMPP or MAMP website, as well as manually downloading and installing WordPress (which does involve some manual moving around of files on your hard drive) configuring your database, and then linking it to your WordPress site.
Once you have the server up and running, you create a WordPress account and then log in to get to the dashboard.
You do all this through your browser so you get the same look and feel as though you were on a live site.
But don’t worry – if all this sounds a bit daunting, you’ll be pleased to know that there’s an easier option.
Using Virtual Machines For Local Development
The other branch of local development environment (and most would argue, the easiest) comes in the form of virtual machines.
If you aren’t familiar with virtual machines, a virtual machine is a partition created on your PC that basically acts as a separate computer.
It comes with its own operating system and is usually accessed in a window like a normal computer program, but is detached from the rest of your software.
This makes it a handy place to carry out any risky experimentation, as anything you do is isolated from the rest of the computer; meaning you can’t do any damage to your main operating system.
The virtual machine is just a place to host your website in our case. You won’t need to have any interaction with the separate operating system as you manage your sites through the dashboard of your local environment.
A popular local environment choice that utilizes virtual machines is Local by Flywheel.
The reason that it’s such a great option is that it does all the legwork for you behind the scenes.
You install it just as you would any other program, and you’re greeted with a simple dashboard that allows you to manage your sites.
You can add multiple sites in just a few clicks, whereas with MAMP/XAMPP you have to create a separate WordPress folder and database for each site and manage them separately.
It’s clear from what we’ve learned so far that an environment like Local is going to be an easier option for those new to local development.
Server stacks might be the route of choice for advanced developers who want more functionality, however, for the purpose of building a site and a safe, offline space, Local is a fantastic choice.
Okay, enough tooting Local’s horn… let’s really find out how easy it is to use.
Here’s a simple guide:
Installing And Using Local By Flywheel
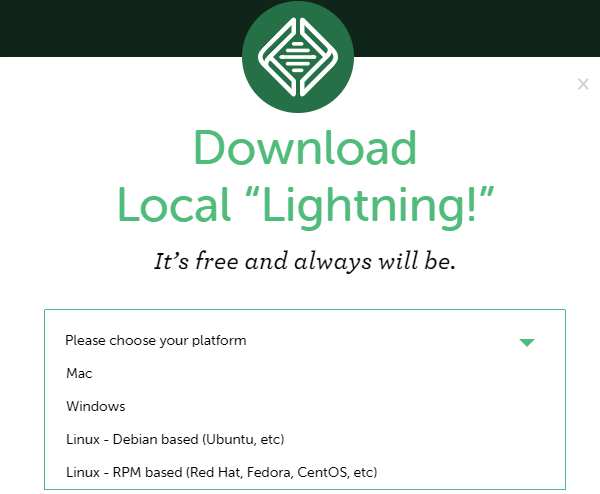
First of all, you’ll need to go to Local’s website and download the software.
It’s super easy to install (it’s literally just like any other program you download from the internet), so I’ll refrain from teaching you how to suck eggs.
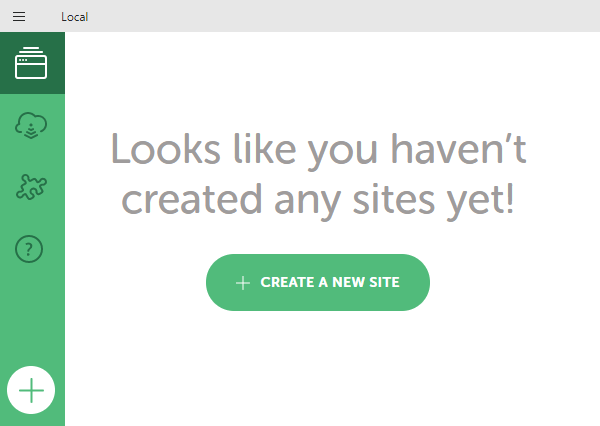
Once you’ve installed and opened the program, you’ll be met with this screen:
You then need to give your site a name.
One of the best things about Local is that you can create as many sites as you need, and they’re all super easy to access and switch between – so try and keep the names practical.

The domain is automatically populated when you name your site, and there’s no need to change the site path at this stage.
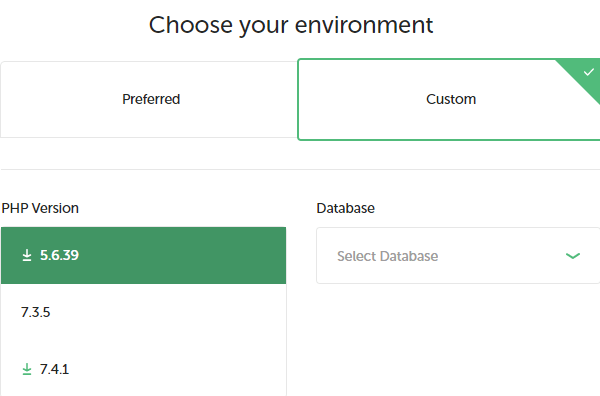
When it comes to choosing your environment, you can select preferred unless you have a specific reason for wanting to use a different type of database or version of PHP.
You then need to enter a username and password (you can use the same one across all of your test sites) and enter an email address.
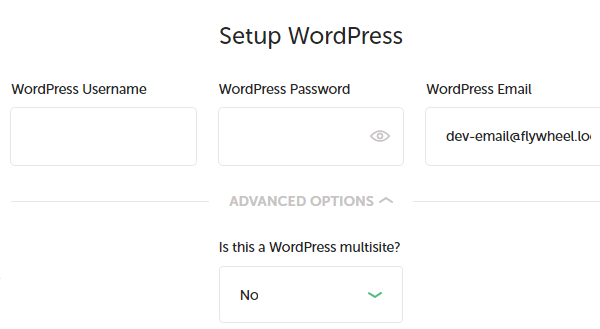
One last click of ‘continue’ and you’re good to go!
It takes a few minutes to set everything up and install WordPress, but as you can see, as far as local hosting environments go, this is one of the easiest to use.
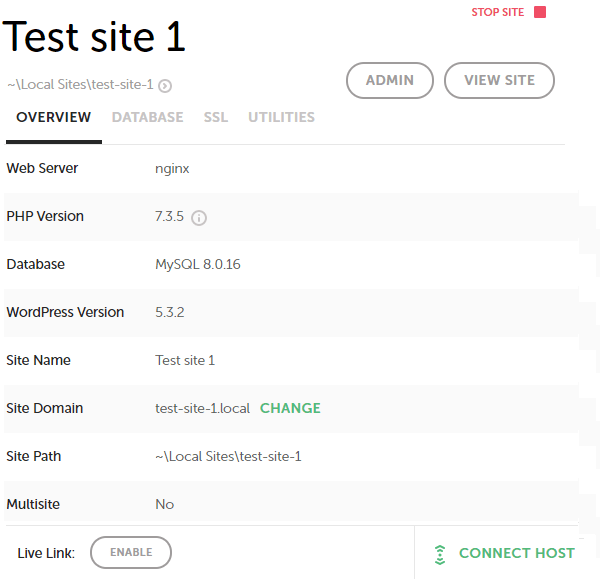
The two main buttons you’ll need are on the top left of your screen: ‘Admin’ and ‘View Site’.
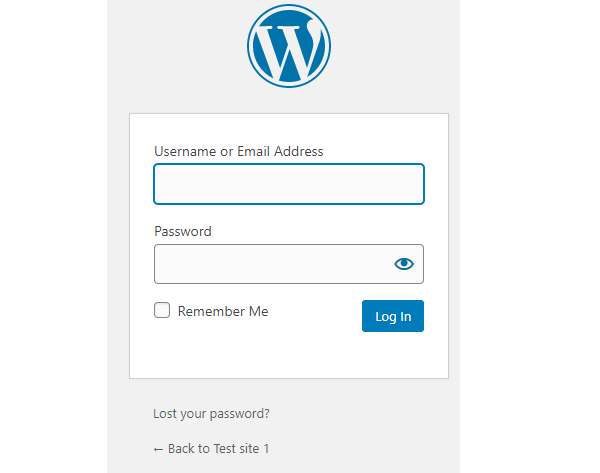
Click on Admin to log into WordPress.
Once you’re logged in, you’re free to use WordPress as you would with any other hosting method.
But That’s Not All, Folks
If all you want is a nice, quiet space to develop your website, the guide above should do the trick.
Since your entire WordPress site is installed on your own computer, it means you can even build your site without internet, which is great for those long train journeys.
However, Local does offer a host of other features.
Some of these are best suited to advanced users, and there are a few that may come in useful for those new to local environments as well.
Below I’ll give you a brief overview of some of my favorite aspects of Local.
Let Someone Take A Little Peek…
One of the main benefits of developing locally is that no one will be able to see your half-finished work.
Whilst this is usually advantageous if you want to create a new site, or make large-scale changes to an existing one in peace, it does mean that if you encounter problems, or just want a second pair of eyes, you can’t just send your site URL to a friend or colleague and ask for their advice.
Local has a useful tool that allows you to create a temporary live link to your site, and it’s as simple as one click of the mouse.
This is a fab little add-on from ngrok and is completely free to use.


You can send this link to anyone you’d like to view your site in its current state.
The link will stop working when you exit Local – or you can manually disable it using the button next to it.
If you want them to access the site again, you’ll need to re-enable Live Link, which will mean that a new link is created.
This is handy if you need someone’s opinion but don’t want to risk them popping back in future by revisiting the link. You’re building your site locally for a reason – it’s fine to want a little privacy!
If It’s Not Broken, Don’t Fix It
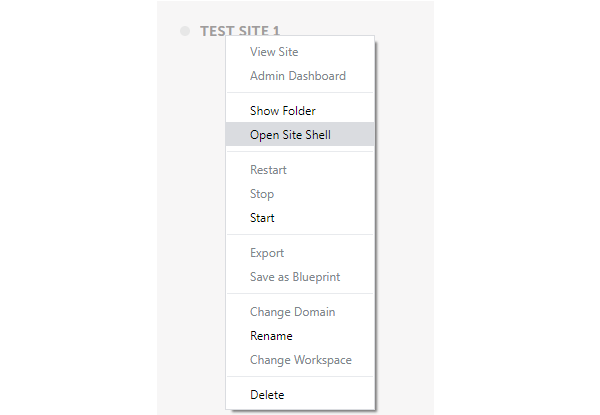
If you tend to use the same set of plugins when you build your sites (our free plugins are a great starting point) or have the same theme or menu and page setup, you can save a site as a ‘blueprint’ and use it as a base for future sites.
If the same site setup works for you then that’s absolutely fine, and luckily Local makes it easy to reuse the same template.
All you have to do is right-click the site you want to use and click ‘Save as Blueprint.’

Now when you create a new site, you’ll have the option to start from your blueprint rather than from scratch. Handy, right?!
Your Files, Your Way
Editing your WordPress site’s files isn’t always the easiest thing to do (especially for beginners).
If your site is live and hosted externally, it will involve either using a plugin such as File Manager, or an SFTP client with an SSH connection.
These platforms allow you to access your WordPress files, which are stored on the host’s server, so that you can make changes to them.
Different hosting providers allow different levels of access to your files. However, when you’re developing locally, you have full access and full control.
With Local, it’s super easy to access these files. They’re stored on your computer, so you don’t need to initiate any kind of connection to gain access.
If you’re a skilled developer, you can still use an SSH connection and WP-CLI commands to edit your files and make changes to your site, however, when you’re working on a site locally, you can click one little button to get access to your files directly.


Just click the little arrow, and you’ll be able to access your WordPress files.
This is a really useful way to get to know the WordPress folder layout and become familiar with some of the key elements of a WordPress site.
From here, you can make changes to your style sheet, create a child theme, or even venture into some of the more complex files.
The beauty of it is that if you change something that creates an issue, you’re free to scrap that site and start a new one.
It allows you to experiment without needing to worry about doing irreversible damage to a live site.
Learn Your Acronyms
A local environment can also be a great place to get familiar with using WP-CLI through an SSH connection.
WP-CLI stands for WordPress Command Line Interface and is a way of completing tasks by typing commands – similar to the way you can use your in-built command prompt.
SSH (Secure SHell) connections are usually initiated between multiple computers – they create a secure connection on an unsecured network.
You may only be communicating with the virtual computer inside your own pc, however, you still need to issue commands through this connection.
Our article showing how to speed up your WordPress development using WP-CLI is a great starting point if you’re new to this.
You can easily access the interface by right-clicking on your site and selecting ‘Open Site Shell’
You can then experiment with different commands.
I typed in ‘wp user’ which shows a list of commands centered around changing user permissions and settings.
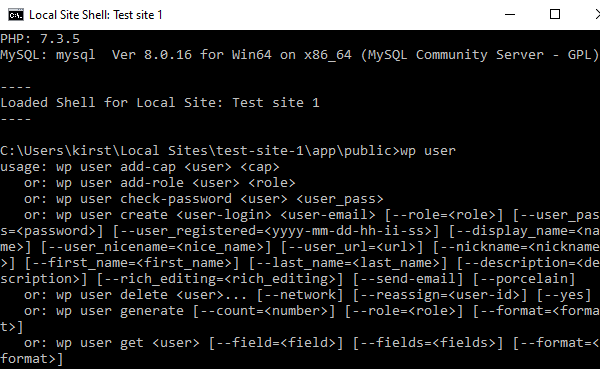
You can find a list of WP-CLI commands on the WordPress website.
These commands are often utilized by developers to make speedy changes to a WordPress site – a local environment is a great place to get to grips with them.
How To Migrate From a Local WordPress Installation To a Live Server
Now your site’s not going to be much good to anyone sitting on your hard drive (unless you’d prefer to keep it that way!). So the next step is moving from a local installation to a live server.
There are a couple of different ways to do this:
- The manual method – Check out this in-depth breakdown of moving WordPress from Local to a live server by Torque.
- The plugin method – We also have our own guide on migrating from local to a live site using the Duplicator plugin – or if you’re one of our awesome members, you can use our Shipper Pro plugin instead 😉
Of course, you’ll still need somewhere to host your live site. It’s advisable to research the different types of hosting and perhaps even compare a few different hosting plans before your site is ready to launch.
You’ve put in all that work after all so you need to choose your hosting provider carefully!
I know of a company that does some really great hosting, you should check them out.
OK, it’s us, WPMU DEV, but I promise you our hosting is top notch. If you do allow us the privilege of hosting your website for you (we’ll take good care of it, I swear).
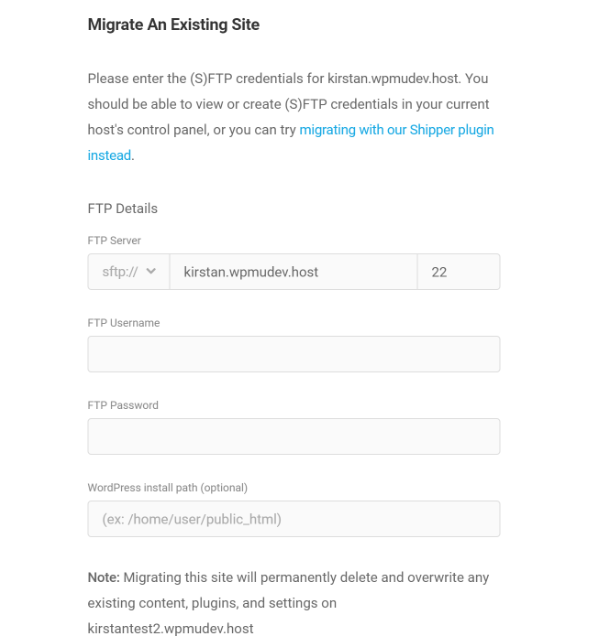
We’ve Also Made it Super Simple To Migrate An Existing Site!
You can also easily migrate your existing site using our WordPress site management tool – The Hub (FYI check out Hub 2.0 Beta which was just recently released!).
All you’ll need is the SFTP username and password of your existing site. You can typically locate these credentials via your host’s control panel.
Some hosts will automatically create an SFTP user for you, while others (like WPMU DEV hosting), will allow you to create one yourself.
For example, here’s how WPMU DEV users can create their own SFTP credentials.
Once you’ve located your credentials, your site can then be migrated and launched in a couple of steps.
Let’s not pretend that migration is always a walk in the park though. Many migrations go smoothly, but some come with a whole host (pardon the pun) of problems.
If you do run into issues when migrating to our servers, you have the peace of mind of having a bunch of WordPress experts at your beck and call. They’re on hand 24/7, ready to solve any problems you encounter.
If you choose to go with a different hosting provider, we’d recommend migrating using our Shipper plugin.
PSA… We’ve labeled April #HostingMonth, and To Celebrate We’re Giving Away $10K !
Subscribe to our blog using the form below this article (you can’t miss it!) to automatically get yourself in the draw – and check out our announcement post for more about our giveaways.
We’re also offering new members 3-month FREE WPMU DEV trials. Giving you plenty of time to test out our hosting, and everything else a membership has to offer.
*Unlock your 3 month free trial coupon here.
So What’s Next?
Your site’s all grown up now – you’ve helped it develop from one simple ‘Hello World’ to (hopefully) an attractive and functioning site.
You can now use WordPress ‘as normal’ through your hosting service and update your site as and when needed.
The local environment you used can always be called upon if you want to test out any major changes or wanted a safe space to play whilst you expand your WordPress knowledge.