


How to Limit Access to Your WordPress Dashboard
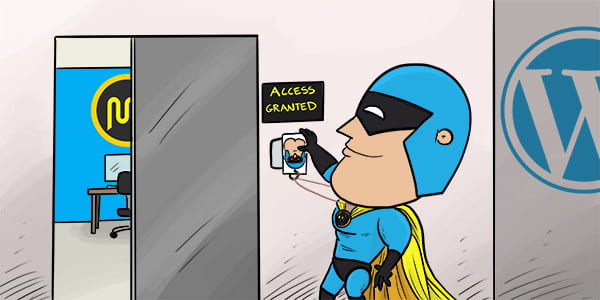
How many people would you hand your house keys to and let get into anything that they want? The same can be said about your WordPress account and its users. In this article, we explore some of the easiest ways to limit access for WP users using the admin, code, and plugins.
If you considered your WordPress site like an online home, you wouldn’t always want everyone going through all of your drawers.
The good news is, after reading this, you’ll know how to hand out digital permission accordingly to your users and keep certain areas inaccessible.
To kick things off…
Why Limit Usage?
You trust everyone that has access to your WordPress account, right? Well, sure. Maybe. However, it doesn’t mean they need to have TOTAL access to everything.
There are times you don’t want every user to access it all.
For example, if you’re running a multi-author blog and just want editors to have access to write and publish — and nothing else. That way they can’t change the themes or plugins while logged in.
Or, maybe you don’t want subscribers to access your dashboard at all.
Whatever the case may be, it’s nice to have control over who has access to what, and set your WordPress site up accordingly.
Let’s start by limiting dashboard access in the WordPress dashboard.
Limiting Dashboard Access With Different User Roles and Permissions
If you’re the site owner, you can assign user roles that control how much access to the dashboard they have.
WordPress roles come with different capabilities and actions that users are allowed to conduct, such as writing and editing posts, creating pages, moderating comments, and more.
An easy way to limit access is to set up a new user as a Subscriber. The Subscriber role is very limited and only allows the user to read content on the frontend of the site and manage their profiles.
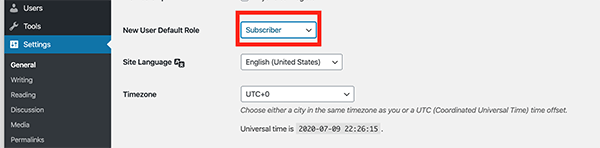
This can all be done in the admin area of WordPress.
To do this, simply go to Settings and then General. From there, just set any New User Default Role as a Subscriber.
You can change the roles of any user that has access to your site at any time. So, any existing user roles can be modified under Users and then All Users.
From there, click the box of the user whose role you’d like to change or you can select numerous users in bulk.

So what’s the difference of roles? The WordPress role options are:
- Admin/Super Admin: Allows access to the site network administration features and every other feature in a single site. Super Admin is only available with multisite.
- Editor: A user who can publish and manage posts, including the posts of other users.
- Author: Users can publish and manage their posts.
- Contributor: Will allow a user to write and manage their posts, but not publish them.
- Subscriber: As I mentioned, it’s very limited. It only allows the user to manage their profile.
As you can see, each role has different capabilities. You can adjust and change roles as needed.
Using Code to Limit Access
Another way of limiting access is with code. It’s easy to paste the following snippet of code into your child themes functions.php file.
This will block non-administrators from accessing your WordPress site’s backend. Only admins can have access and all other users will be redirected to the home page.
This code only functions when a user logs into the WordPress dashboard. It won’t apply to any user that’s not non-logged, because they wouldn’t have any dashboard access, to begin with.
If code isn’t your thing, there’s always a way to…
Prevent Users From Access with a Plugin
Plugins can have some advantages over the other options of limiting users. Plus, let’s face it, they’re easy to use.
For example, you can simply restrict access to user roles or users that have specific permissions and redirect others to a specific page. This makes it so that only trusted users can have dashboard access.
Here’s a quick rundown of several plugins (some with familiar faces) that can help limit access to your WordPress dashboard.
All of these are free to use, rated well, and have specific functionality.
Remove Dashboard Access
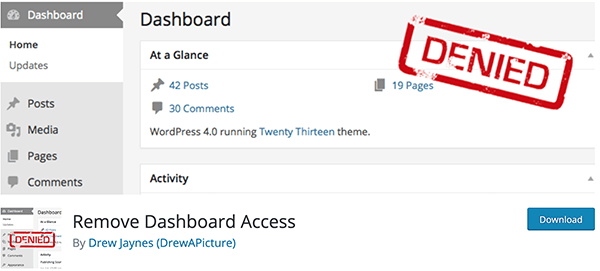
The Remove Dashboard Access plugin is a simple and easy way to limit access for users in your WordPress dashboard. With 5-star ratings and over 40K downloads, it’s a quality and popular option for many WordPress users.
Once you have it downloaded and installed, it’s just a click of the button to limit users to the admin area.
In the Dashboard Access Controls area, you can allow the dashboard access for administrators only, editors and administrators, or authors, editors, and administrators.
There is also an advanced option for numerous options of more specific areas (e.g. ability to view story budget).
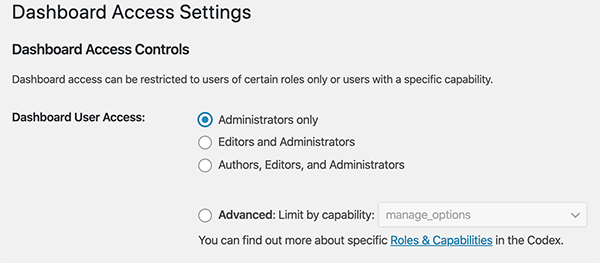
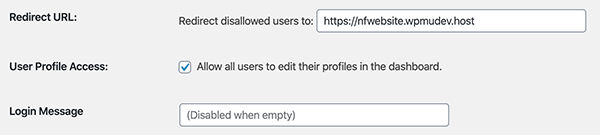
You can also input a redirect URL for disallowed users, allow all users to edit their profile, and also add a customized login message.
Overall, if you’re looking to quickly limit your user’s options in the dashboard, this plugin has the essential features to do so.
Branda
If you want to take things up a notch, with Branda, our very own 5-star rated white label plugin, you can customize every aspect of WordPress to match your brand.
Plus, she can customize your admin menu based on user roles or custom user in the dashboard, which will allow users to have access to specific areas.
Once you have her installed and activated, all an be done in the Admin Menu and by clicking Activate.
In the Custom Admin menu area, you can fully customize the admin sidebar for selected user roles or specific users.
There’s a Customize button that when hit, will display all of your options. You can decide from the dropdown if you want to customize the menu for user roles or specific users.
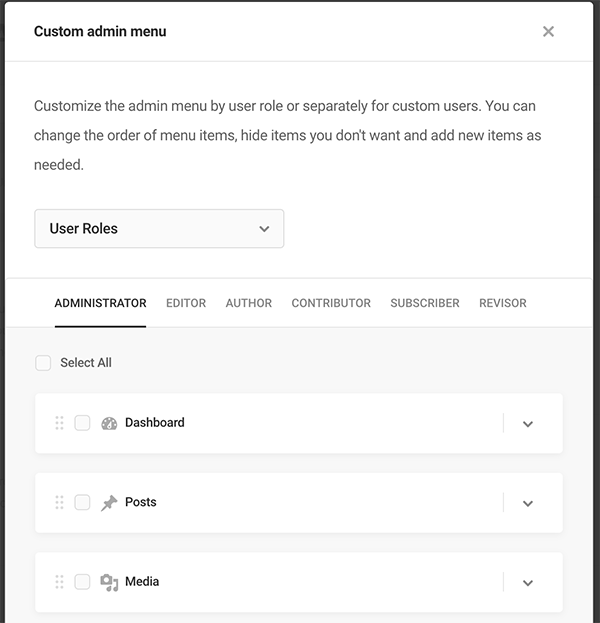
If you have User Roles selected, you’ll see that you have the option of picking a role (e.g. Administrator).
It will refresh and automatically populate the admin menu items that the user role has access to by default.
You can also now drag and drop the top-level menu items if you’d like to re-order them.
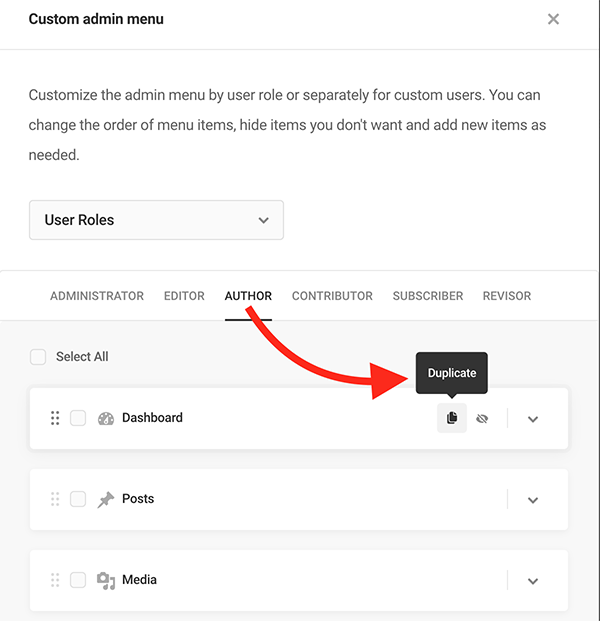
When you hover your cursor over any menu item it will reveal Duplicate and Hide options for that item. You can also Select All or use the checkbox in any menu item to reveal the same to perform this in bulk.
The Hide option will hide it from the user in the selected role and Unhide will then appear as an option if you’d ever like to revert this.
The Duplicate option will create an exact duplicate of the menu item (including its sub-menu).
You also have additional options for any menu item by clicking the dropdown arrow. This includes options to add your own custom top-level menu item, adding a submenu, CSS classes, and much more.
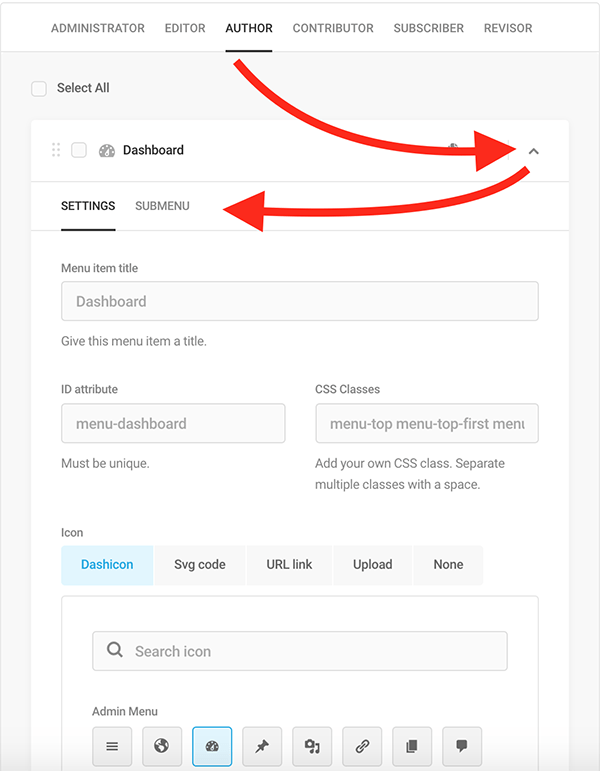
Once all of your changes are made, just hit Apply and everything will stay that way. You can always discard all changes and adjust them at any time.
Along with allowing users to access certain areas in the admin area of WordPress, Branda can totally brand your admin area and site with tons of other customization options.
Defender
Defender is WPMU DEV’s 5-star plugin and our answer to security. Amongst numerous security features, one function Defender does well is disabling the file editor, so that only the admin can make any changes to the file editor that’s built into WordPress.
All of this can be done with a click of a button in an area called Security Tweaks.
Here, it shows a list of various security features that can be enabled and disabled at any time. One of the features is to Disable the file editor. Simply click the switch over if it’s in the Issues area.
If it’s not, it will be highlighted green and in the Resolved section. Once doing that, it will let you know that it switched over okay.
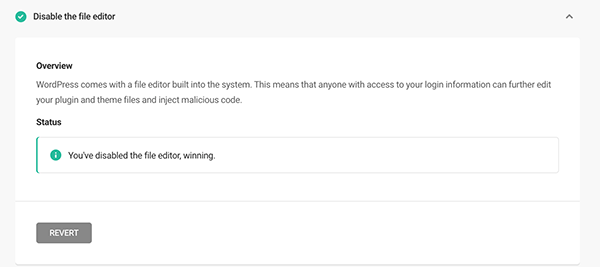
You can revert this feature at any time by clicking Revert.
Defender is a great additional way to limit your users in the WordPress admin and keeps your files secure. Try him out for free today for your security and to limit access to files.
Admin Bar & Dashboard Access Control
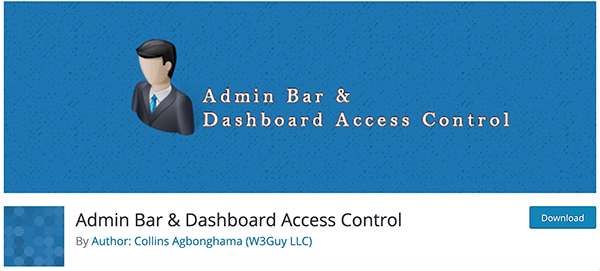
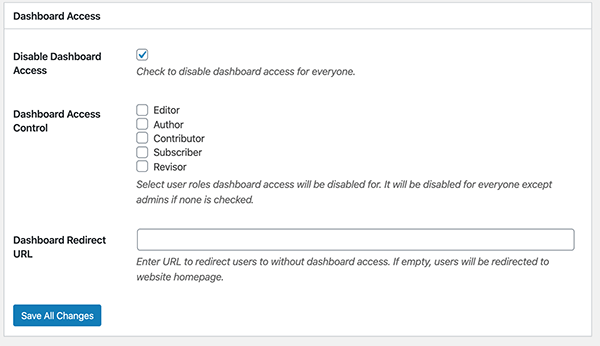
The Admin Bar & Dashboard Access Control plugin allows you to limit dashboard access for users. It has a solid 4.5-star rating and over 5,000 downloads.
The Dashboard Access area lets you disable dashboard access to various user roles with just a few clicks. You can also enter a customized redirect for users without dashboard access.
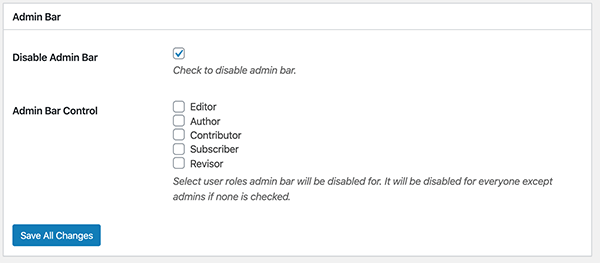
In the Admin Bar area, you can disable the admin bar and select user roles for users you’d like it to be disabled for.
And that’s it! This simple and easy to use plugin is a quick option to limit your user’s admin access. It very basic, similar to the Remove Dashboard Access plugin.
We’ll Limit It to That…
As you can see, it’s very easy to limit dashboard access for users. You have several options when it comes to doing this; whether it be directly from the admin, a code snippet, file access, or with the help of a plugin like Branda.
What matters most is you’re in control of your WordPress site and know who can do what when you allow users access.
Otherwise, your users might be snooping in areas of your site that you might not want them. That can be, well, awkward (and insecure).
So, put a limit on things today.